Partial mashing a.k.a. mini mashing for the first time

I’ve always been an extract brewer with the intention of moving over to all grain brewing once I become proficient at extract. Finally decided to make the jump recently.

At this point, I’m confident enough in making my own recipes that I don’t need to buy a kit; I can figure out which malts or grains, which hops, and which yeast I want to use. This definitely came in handy when trying to decide which grains to use for my first partial mash brewing session. I decided to shoot for a highly hopped rye I.P.A.

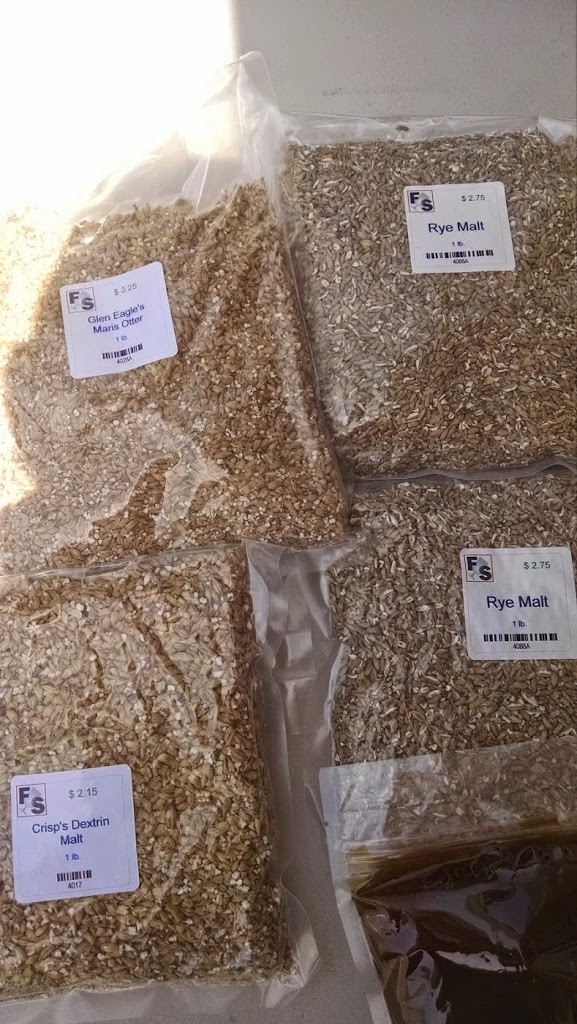
After doing a bit of research, I learned you typically need a quart of water for every pound of grain you’ll mash. For my recipe, I have 4 pounds total:

  • 2 lb. rye
  • 1 lb. maris otter
  • 1 lb. dextrin malt

I also learned you typically want to mash for about an hour, and you want to hit a very specific temperature range, between 150 and 152 F. Mine was a couple degrees higher.

There seem to be many ways to “rinse” or get a second mash out of the grain; I basically did another mash after emptying the liquid wort, and then mashed out – brought the temperature to about 180 F.

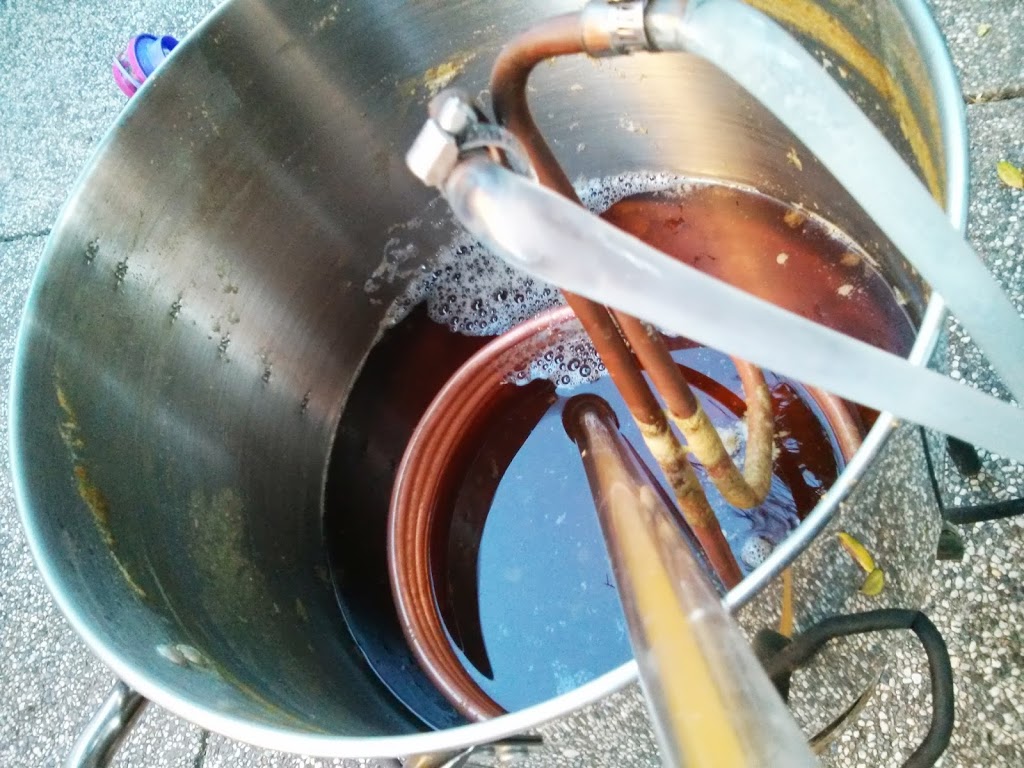
Once you’ve done this, then it’s time for the boil, and everything from here on out is the same as extract. It was definitely more work to do the partial mash, but I’m excited to try the final product to see if I can taste the difference. Here was the hopping schedule I used:

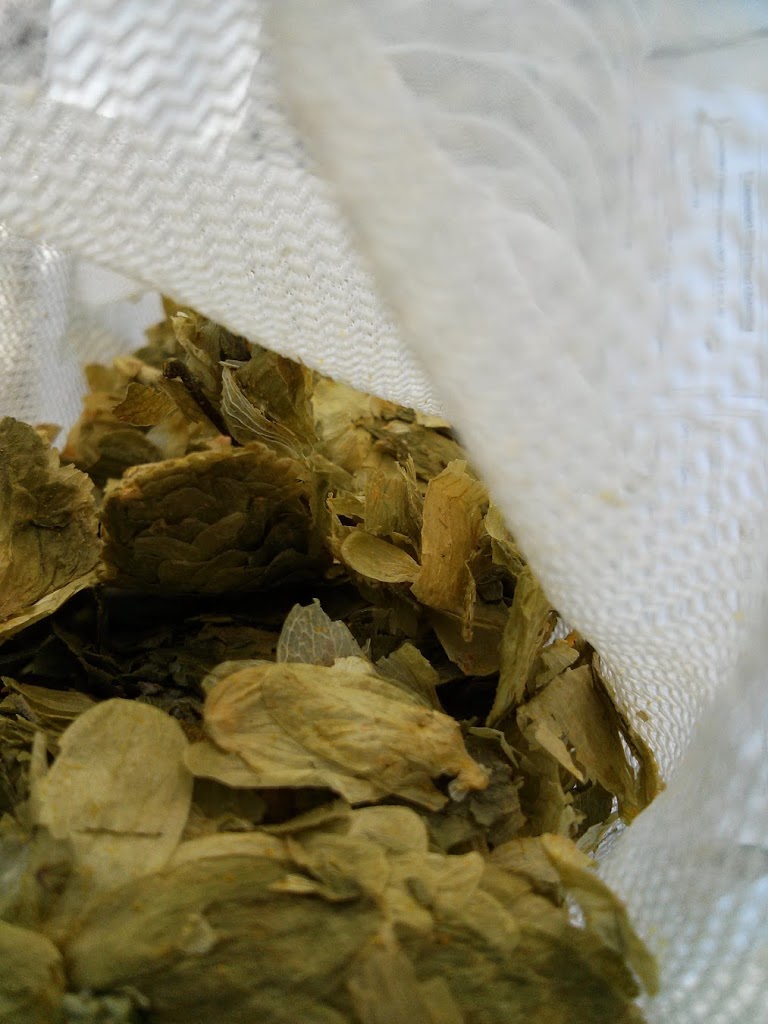
  • 1 oz. simcoe 60 min.
  • .5 oz. simcoe 30 min.
  • 1 oz. mosaic 15 min.
  • 1 oz. citra 15 min.
  • 1 oz. mosaic 5 min.
  • 1 oz. citra 5 min.
  • 1 oz. mosaic 0 min.

I went with California Ale WLP 001 for yeast pitch(2 liquid vials).

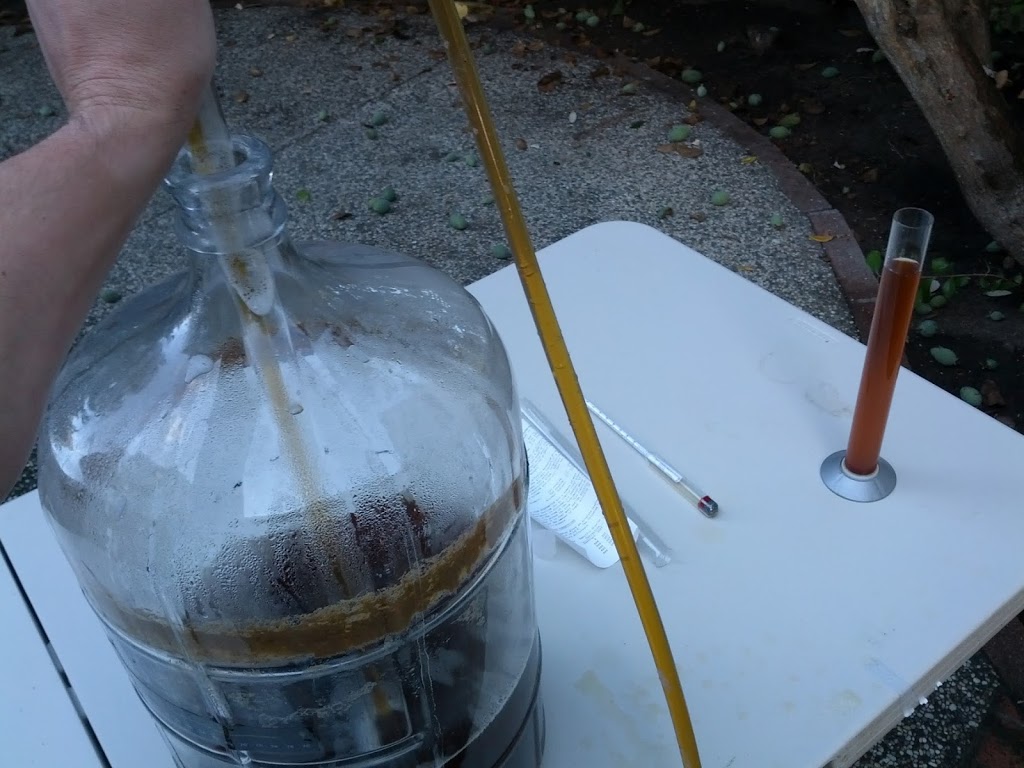
I’m shooting for 7% abv, and O.G. measured at about 1.064, so if it attenuates like it should, then it looks like it will work out.

Kegging vs. bottling

Let’s discuss the pros and cons of kegging beer vs. bottling beer.

The most important factor here is cost. Plain and simple: kegerators are expensive, at least compared to bottling. I’ve seen the price on kegerators drop recently, so it’s not as expensive as it used to be, but if you’re just starting out with home brewing and you’re not sure how serious you’re going to get, making an investment in a kegerator is a big decision.

Bottling your beer is much, much cheaper, but it takes longer and is more work. You need to either a.) buy empty bottles or b.) re-use consumed bottles from beer you have purchased. You need to be extra careful about cleaning and sanitizing if you decide to re-use bottles. I’d also recommend avoiding bottles that use labels or stickers and stick with the ones that use etching.

Kegging usually takes about 2 or 3 days to force-carbonate beer, whereas bottling can take about 2 weeks before the beer is bottle conditioned or carbonated. So let’s re-cap advantages of each:

Kegging

  • Fast – drink your beer 2 or 3 days after kegging
  • Easy – no cleaning and sanitizing dozens of bottles and racking beer to each
  • Fun – let’s be honest, it’s pretty fun to pull on the tap and get a fresh, cold beer for you and your friends
Bottling
  • Cheap – especially if you re-use bottles
  • Mobile – bottles are easy to transport and share
  • Versatile – you can also have fun with designing your own label, etc.

What’s Happening When Beer is Fermenting?

The fermentation stage of home brewing is where the magic happens. Ya, it can take a while – typically about two weeks, depending on the kind of beer you’re making – but it’s worth the wait.
You could spend a lifetime studying the science behind fermentation, but it basically boils down to this: yeast eats sugar and turns it into alcohol(and CO2). And the process is pretty simple, really. Once you’ve finished the boil and you’ve added hops etc, then you need to let the wort cool down to at least 80 degrees or so. If you don’t let it cool down enough, you run the risk of killing the yeast you’re about to pitch into the wort.
For most home brewers, bags of ice or immersion chillers are the most common methods of cooling down the wort. Once cooled, it’s time to pitch the yeast. Beginning home brewers will likely be using powdered yeast, or liquid yeast in a vile. If you’re using liquid yeast, make sure to bring it down to room temperature before pitching. If you’re using powdered yeast, it’s best to re-constitute before pitching, although not completely necessary. If you do re-constitute, make sure to purify the water by boiling it for at least 10 minutes, or you could contaminate your beer.

After pitching the yeast, it’s best to aerate the wort. You can do this by swishing it around for a few minutes. Other methods include aeration rods or stones, which are typically more efficient than the grab-and-swirl method. The yeast needs oxygen in order to do it’s job, so this is important.

There are two things you want to do while your beer ferments: 1.) Keep it out of sunlight, so a dark room or wrapped in a blanket or towel will do, and 2.) Keep the temperature within the recommended range. The recommended temperature can vary greatly depending on the type of beer your making. It can have a dramatic effect on the beer as well. Too hot or cold and you risk killing the yeast. Dialing it up or down slightly can change the flavor as well.


Using hops and home brewing

Let’s talk about hops.
Hops are one of the main ingredients in almost every beer brewed. It serves a few purposes:
  • acts as a preservative
  • used for bittering
  • used for flavoring
  • used for aroma
Many beers try to strike a balance between hops and malt, bitter and sweet. Beers that are heavy on one end will commonly be referred to as “hop bombs” or “malt bombs”. Bomb doesn’t necessarily imply the beer is bad; rather, it’s just heavy on that ingredient compared to it’s counterpart.
When brewing, there are typically five stages during which you can add hops:
  1. Pre-boil, or “first wort hopping”(a.k.a. FWH) – for bittering and aroma
  2. Beginning of boil – for bittering
  3. Mid-to-late boil – for flavoring and aroma
  4. End of boil – for aroma
  5. Fermentation, or dry hopping – for aroma
Hops with high alpha acid levels are typically used for bittering, since most if not all of the flavor disappears during boil. First wort hopping is not necessarily a new thing, but has home brewing becomes more and more popular, it is starting to become more common.
The most common forms of hops are pellet and whole cone. Extract and paste are starting to become more popular as brewers are discovering there is little difference in the results.

Cleaning and sanitizing

The most important part of home brewing is cleaning and/or sanitizing. You could make the best beer in the world, but if it gets infected, chances are it’s not going to taste very good.

Every home brewer should have at least the following two things:

1. A cleaning agent, such as PBW

2. A sanitizing agent, such as StarSan

The PBW will be very useful in removing hard, sticky stuff like yeast stuck to the side of the carboy, or leftover wort in the boil kettle. Just throw in a spoonful, fill with water, wait an hour or two to let the cleaner work, and then scrub and/or dump. Don’t get lazy and put this off; take my word for it.

Secondly, anything that touches the beer, or wort, once it’s done boiling, will need to be sanitized with StarSan. This includes the carboy(vessel which will hold the beer while it ferments), siphon, airlock, etc. Just add a small amount of StarSan to some water in a bowl or bucket and let your items soak for about 10 minutes. For the carboy, add some to the carboy and file the entire thing with water and let it set for 10 minutes as well.

If you decide to do a secondary fermentation or check on the progress of fermentation at all, make sure you sanitize anything that will touch the beer, such as a thief or test tube.